The default design or 'theme' your website uses is a yellow theme as shown to the right.
You can change the theme your website uses at any time following these steps.
Step 1: Access your website's Dashboard
To edit your website, you need to access your Dashboard which contains all the admin tools. You were sent a link to your Dashboard when you set up your website, but if you don't have that email anymore, to access your Dashboard you simply add /wp-admin/ to the end of your website address.
So if the website you set up was benjohnson.liveteachguitar.com then to access your Dashboard you would go to benjohnson.liveteachguitar.com/wp-admin/
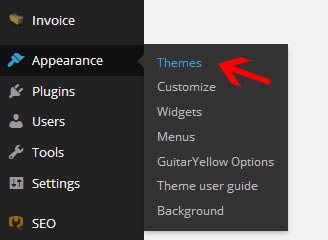
On the left menu, click 'Themes' under 'Appearance'
Step 2: Try out different themes
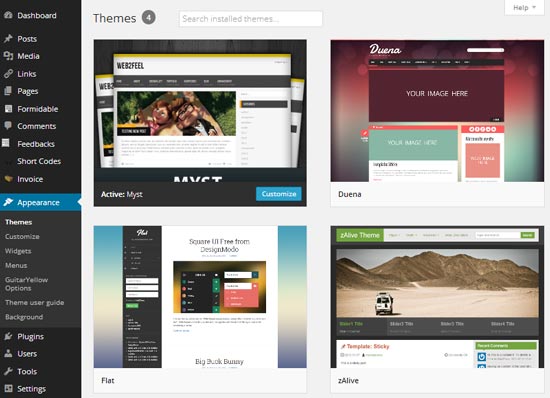
You will see a range of different themes to choose from as shown below (more themes will be added over time).
We highly recommend testing out a theme before changing it. To preview a theme simply hover your mouse over the theme and click 'Live Preview' as shown below:

You will see a preview of your website with the new theme as shown below:
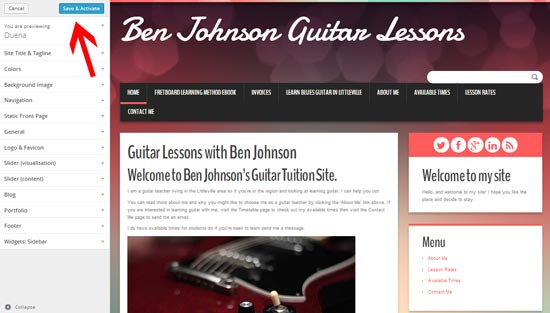
The left panel will allow you to make some quick changes before you decide to change your website to use the theme. Once you are happy with the new theme, simply click the 'Save & Activate' button. Your website will instantly change to use the new theme.
Step 3: Fine tuning your new theme
Some themes will need some fine-tuning as different themes use different layouts and features. In the above image you can see that in Ben Johnson's website, the top menu now includes extra pages that were hidden in the original theme. You may notice similar changes when moving to a different theme.
We'll have a look at a couple different possible fine-tuning details you may need to watch out for when changing between themes.
Menus
Some themes deal with menus differently. Some themes only use one menu while other themes use multiple menus. In the above example the menu in the new theme has added all pages to the top menu when some pages were meant to be hidden.
To change the menu, click the 'Menus' option under 'Appearance'.

The 'Menu Structure' area will show what pages will display in the menu. Make sure all the pages you want to display on the menu shows in this area. You can move each page around to change the layout as you wish.
Under the 'Menu Settings' section you will see checkboxes for 'Theme locations'. Some themes will only have one location for a menu shown by one checkbox (as shown in the above example as one menu for 'Primary Navigation'). If multiple checkboxes display, you can change which location a menu shows and you can even create multiple menus for each separate location.
Sidebar
The sidebar you see to the right (or left) on most themes allow you to create different links, widgets or menus. Some themes only use one sidebar while other themes may have two or three. To change these options, go to 'Widgets' under the 'Appearance' menu.
There are a large range of different widgets you can include in your sidebar. You can include anything from a signup form for your email list, to a Facebook like box or form to display past invoices for a student. If you need help setting up any widgets on your website, simply contact us and we'll give you a hand.
Summary
The design and layout of your website is very important in giving potential students a good first impression of you and your services. Choose a theme suitable for your target audience and you will find you will receive more inquiries from potential students. This basic tutorial has given you a good starting point in managing your website. Be sure to contact us if you're unsure how to customize a certain feature or would like help with your design.