Once you have finished setting up your invoicing options as explained in this tutorial, you can start creating and issuing invoices to your students. Let's have a look at how to create and send an invoice. If this is your first time creating an invoice we recommend creating an invoice for a small amount and sending it to yourself or somebody else to pay as a way to test your new invoicing system. That way you can be sure it will work smoothly with your students.
Step 1: Add new Invoice
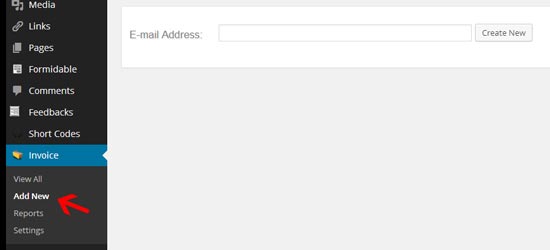
Access your website's Dashboard and click 'Add New' under the Invoice menu on the left. You will be presented with a field to enter an email address as shown below:
If this is the first time you're creating an invoice for a student, you enter their email address then click 'Create New'. Alternatively, if you are creating an invoice for an existing student, select their email address by clicking the email address space and clicking their email address from the drop down menu.
Now there's a lot of fields and options in the main invoice screen so let's look at each area separately so you know exactly what they all do and whether you need them or not.
Step 2: Invoice name and description
On the top left of the screen you will see this without any information filled in:
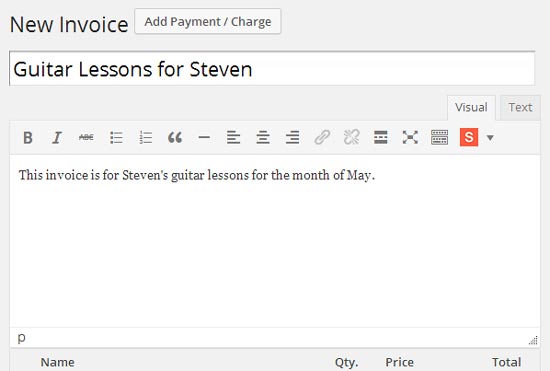
In the top field we recommend including the student's name so both you and the student know the invoice is meant for them. In the big field you can add notes or any instructions for the student. Keep this short and simple. In the above example we've kept it to a very basic description.
Step 3: Choosing services
Directly below this area is where you can enter what services the invoice is for:
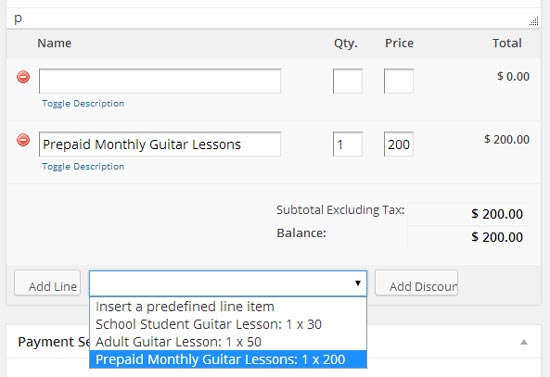
You can either manually enter the details next to the red minus button or select any saved line items you created in the previous tutorial. In this example we selected the 'Prepaid Monthly Guitar Lessons' option and it has automatically filled in one of the lines.
Simply click the red button to remove any unwanted lines. Most of the time you will only send invoices for one thing at a time so you won't normally need multiple lines. As an example if you charge for other services as well as teaching such as guitar repair, you can enter that service in another line or click the 'Add Line' button to add more lines.
The 'Add Discount' button can be used to apply a discount to the invoice. Ensure the total is correct before you move on.
Step 4: Payment options
Directly below this section is the 'Payment Settings'. You can send invoices with different payment options depending on each student's needs.
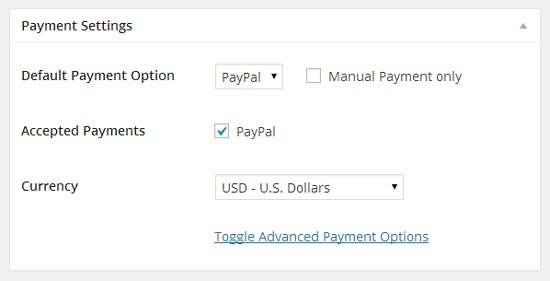
Choose the default payment option and check the relevant boxes on which payment options you will accept from the student. In this example we have selected PayPal as the only option.
Manual Payments: you can send out invoices purely for record keeping if you want. Checking the 'manual payment only' box will send the invoice but won't collect payment. Then you can provide instructions in the invoice using the description space in Step 2 above to provide bank details or explain payment methods. This is handy for students paying cash as you can use this invoicing system to keep track of their payments.
Ensure the correct currency displays before continuing.
Step 5: User Information
To the right of the payment settings area is the 'User Information' area. Fill in the details for new students and it will save the details for any future invoices.

The drop down box showing the email address (blurred for privacy) allows you to select any saved students from previous invoices. Keeping accurate contact details here is a good idea.
Step 6: Advanced settings
On the top right of the screen is the 'Publish' area. Click the 'Toggle Advanced' text to see these options:
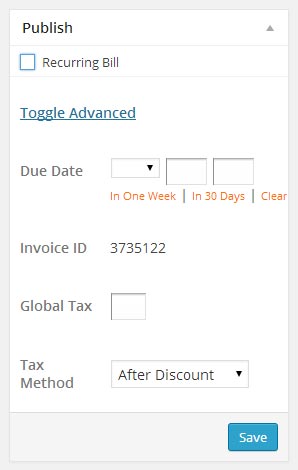
Due Date: you can set a due date for this invoice. Click the red text to quickly set it for one week from now, in 30 days or to clear the date. Having a due date will help avoid issues with unpaid invoices.
Invoice ID: this is automatically generated and useful when you have a lot of students and send out a lot of invoices.
Global Tax: you can set the tax rate here as a %. So if your rate rate is 10% as an example, simply enter '10' in the field. You will notice that the total of the invoice will update automatically.
Tax Method: If you also set a discount on the invoice, you can choose whether tax is calculated before or after the discount is applied.
Partial payment: If you allowed partial payments in the inital setup, there will be a checkbox to allow partial payments here (not shown). Simply enter the minimum amount you will accept as a partial payment and the student will be able to make partial payments based on that minimum.
Step 7 (optional): Recurring billing
Our favorite feature with this invoicing system is the ability to set up automatic payments using your preferred payment gateway (eg: PayPal). This means you simply create one invoice and you will automatically be paid on-going. The student won't need to do anything either, once it is set up, the payments will continue. Here is how to set it up:
Click the 'Recurring Bill' checkbox under the main 'Publish' heading and it will expand with the recurring bill options:
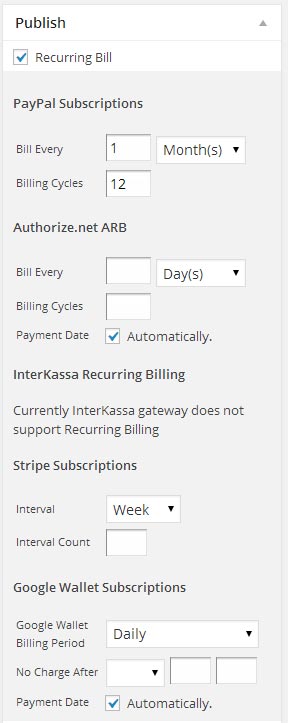
In our example we're using PayPal so we fill out the section under 'PayPal Subscriptions' as follows:
Bill every __: this will set up how often the payment is automatically collected. In this example we're collecting a monthly payment from the student so we have set it to every 1 month. Alternatively you could set it to weekly. People tend to prefer longer cycles as receiving a confirmation every week can be a bit overwhelming.
Billing cycles: this will set how many times the payment will automatically be collected. So for this example we want the payment to continue for a year so 12 cycles has been set.
Other gateways: you can see that the other payment gateways apart from InterKassa all accept recurring billing. Whichever gateway you use, ensure the correct details are filled out.
Click Save to continue
Step 8: View and issue invoice
After you click 'Save' the screen will refresh and display as shown below:
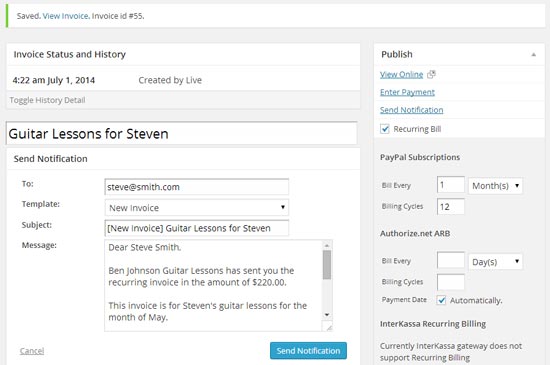
At this point the invoice has only been saved - it hasn't been issued to the student yet. This gives you an opportunity to double check the details before sending.
To preview the invoice, click the 'View invoice' link at the very top or click 'View Online' under the 'Publish' heading. It will open in a new window and show you what your student will see.
The Invoice now has a history section for you to keep track of. You can see that this invoice was created 4:22 am July 1, 2014. Another line will display once it has been paid.
To send the student an email notification and link to the invoice, simply fill out the 'Send Notification' area. Here's how to do it:
To: ensure the student's email address is correct so they receive it
Template: select 'New Invoice' template to pre-fill the message. This saves you a lot of time instead of entering it in manually. You can see above that the names and amount has been updated in the message field.
Subject: this will pre-fill after you select a template. We recommend keeping them consistent.
Message: Only make small amendments if needed. A link will be included in this email to take the student to the invoice so be careful you don't accidentally delete the link.
Click Send Notification to issue the invoice to the student
This is what the student will see after they click the link in their email (the invoice is loaded in your website so it may look different depending on the theme you use for your site):
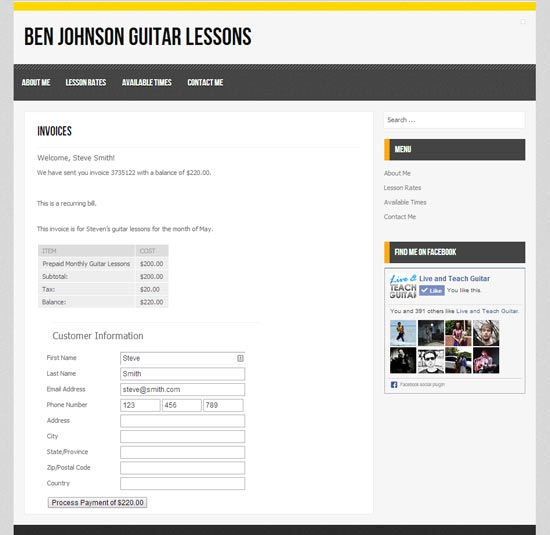
The student can see all the details, the total cost, any notes you leave and their contact details. The student can update their details if anything has changed which is a handy feature.
At the bottom of the invoice is a button to pay for the invoice.
In this example PayPal was the only payment option given to the student so when they click the 'Process Payment of $220' button, they will immediately be taken to the PayPal website to complete payment. After they complete payment they will receive an email from us to confirm payment and we will receive an email (as set up in initial settings). If IPN was set up correctly then the invoice will automatically be marked as 'Paid'.
Step 9: Viewing existing invoices and reports
Now that you have sent an invoice, you can go back at any time to check it or make changes. Simply click the 'View All' menu option on the left 'Invoice' menu to see a list of all saved invoices.
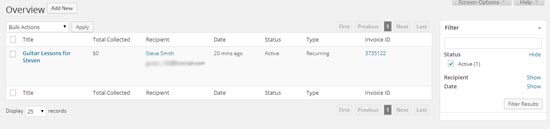
In this view you can easily which invoices have been paid, which ones are recurring, when each invoice was created and who it was issued to. You can even filter the view using the form on the right. So if you want to see only unpaid invoices or see invoices for a certain student, you simply enter the details on the right and click 'Filter Results'.
Once you get used to creating invoices the Reports screen will provide you with a quick visual display of the payment status of all invoices as well as other details.
Summary
You now know how to create and issue invoices. If you need any help with this invoicing system, simply contact us here and we'll give you a hand. It may feel like a lot of work after having a quick look at this guide, but after you have created one or two invoices, it will become clear how quick and easy this process is. Setting up a recurring payment eliminates the hassle of manually collecting payments and we highly recommend it. Keep in mind you can easily send reminders to students by viewing an invoice and sending a notification using the reminder template.