When you set up your own website as part of Live and Teach Guitar Membership, you have the ability to create invoices and accept payments through your website. It's an excellent way to accept payments from students and keep track of your payments over time.
In this tutorial we will explain how to set up invoicing and what options you have to collect payment.
Step 1: Access your website 'Dashboard'
To edit your website, you need to access your Dashboard which contains all the admin tools. You were sent a link to your Dashboard when you set up your website, but if you don't have that email anymore, to access your Dashboard you simply add /wp-admin/ to the end of your website address.
So if the website you set up was benjohnson.liveteachguitar.com then to access your Dashboard you would go to benjohnson.liveteachguitar.com/wp-admin/
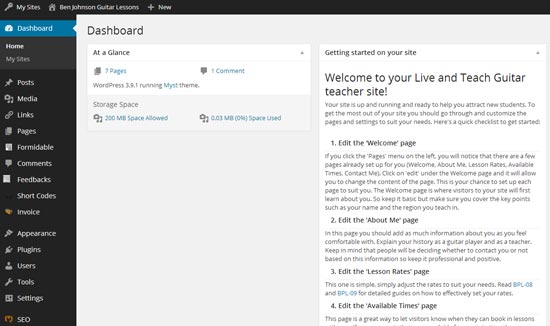
Simply enter your Live and Teach Guitar username and password and you will be taken to your Dashboard which will look something like this:
Step 2: Access the Invoicing settings
On the left main menu, you will see 'Invoicing'. That is where you will manage your invoices. Click 'Settings' to set Invoicing up as shown below:

The first time you click this you will be taken to a 'First-Use' setup screen as shown below:
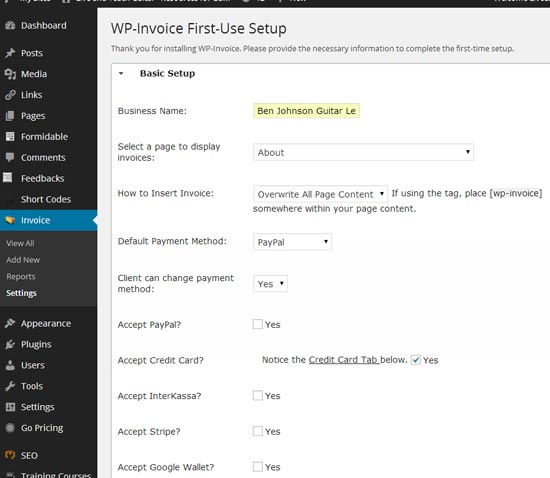
Here's our recommended settings for this screen:
Business Name: the name of your studio or your name with 'Guitar lessons' added to the end (eg: Ben Johnson Guitar Lessons)
Select a page to display invoices: The default is the 'About' page - do not leave it on this option. We have set up a blank page for your template with the title 'Invoices'. We recommend changing this option to the Invoices page using the drop down menu.
How to Insert Invoice: You can leave it on 'Overwrite All Page Content' as the Invoices page is already blank.
Default Payment Method: this depends on what payment options you want to offer your students. We recommend PayPal as it's very popular and low cost compared to other options. Other payment methods are explained later on.
Client can change payment method: If you offer multiple payment methods (eg: PayPal & manual payment) then leave this on Yes. Otherwise if you only offer one payment option then change it to No.
Accept PayPal?: Select Yes if you plan on using PayPal to collect payments. We recommend this option because it's easy to set up and PayPal is already very common so people will likely already have a PayPal account or will feel comfortable paying via PayPal. It's also very cheap.
Accept Credit Card/InterKassa/Stripe/Google Wallet?: At the moment the only online payment method we recommend is PayPal.
Important: Click 'Save all Settings' at the bottom of the page before continuing.
Step 3: Set up your payment gateway options
In this example we will look at how to set up PayPal as that's what we recommend.
1. Set up a PayPal account
If you don't already have a PayPal account you would need to set one up by visiting www.paypal.com
2. Click the 'PayPal' tab that will appear at the bottom of the setup screen after you check 'Yes' to accepting PayPal. It will expand as shown below:
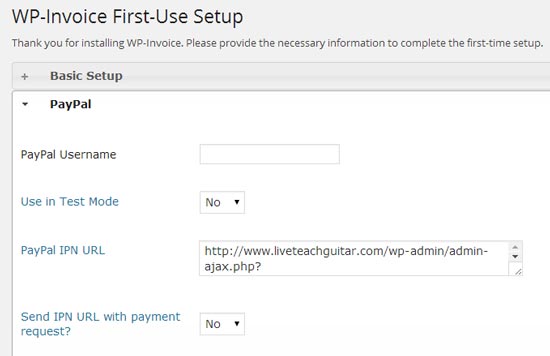
3. Set up the details
PayPal Username: this is your email address you used for your PayPal account. Make sure this is correct or else you won't receive payments!
Use in Test Mode: this will allow you to test out the invoicing system using PayPal's 'Sandbox' system. It takes a fair amount of effort to set up so we recommend you leave this option on No. It's easy enough to test your system by creating an invoice for $1 and asking a friend or family member to try it out.
PayPal IPN URL: a long website address will generate in this field. You will need this for the next step. Do not delete or change it.
Send IPN URL with payment request?: Change this to Yes. This is important as it ensure that your website is notified by PayPal once an invoice has been paid. Very important.
Important: Click 'Save all Settings' at the bottom of the page before continuing.
4. Set up IPN in PayPal
IPN stands for Instand Payment Notification. It's basically how PayPal will communicate with your website. When you send an invoice to a student and they click the button to finish the payment on PayPal's website, you need IPN enabled for PayPal to let your website know when the payment has been made. Then the invoice will automatically be updated to 'Paid'. Without IPN, all invoices will remain as unpaid even if they have been paid. So it's very important to set up IPN.
Please note PayPal are constantly changing the layout of their website so it may look different to what is shown below.
1. First, log on to your PayPal account
2. Click 'Profile' from the top menu
3. Click 'My Settings' to see your account type. If it is set to 'Personal', you will need to upgrade it to 'Business' to enable website payments. It will also allow you to use your trading name which is useful if you use a studio name. There are no fees to set up a business account.
4. Go back to 'Profile' and click 'My Selling Tools' as shown below:
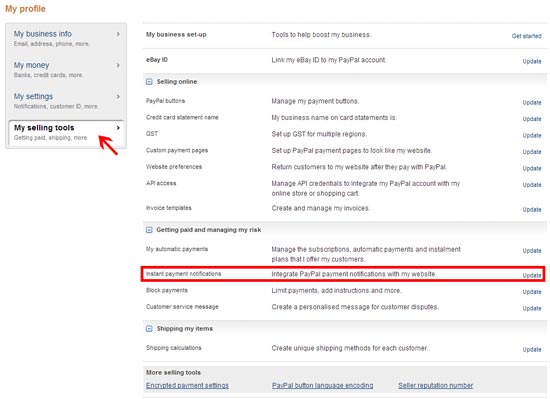
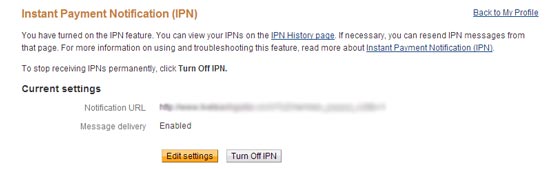
5. Click on 'Update' next to 'Instant payment notifications' as shown above. It will ask for a Notification URL. This is where you paste the IPN URL generated on the PayPal settings screen on your website. Highlight and copy the entire URL and paste it here. Click save. You will see a screen like this if successful (URL blurred out for privacy):
Step 4: Main settings
After completing the initial setup you will see this main settings screen:
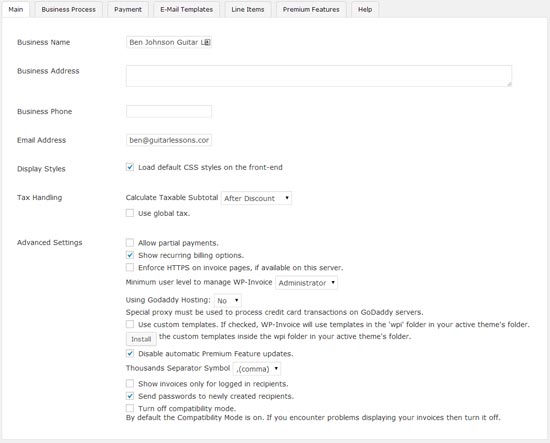
Here's the main areas to change:
Business Name, Address & Phone: add your contact details here to show on invoices
Email address: ensure your correct email address displays here (note this does not need to be the same address as your PayPal address)
Tax Handling: check the global tax box if you need to set a fixed tax % for each invoice. Otherwise you can easily change this on each invoice as you go.
Allow partial payments: we recommend leaving this off to encourage full payment but if you want to give flexibility you can allow partial payments for students.
Show recurring billing options: highly recommended as it allows you to set up automatic recurring payments.
Send passwords to newly created recipients: recommended to be checked as it will send new students a password they can use to log on to your site.
Other advanced settings: you do not need to worry about the other advanced settings. If in doubt, contact us.
Click Save at the bottom before continuing.
Step 5: Business Process Settings
The next tab at the top of the screen takes you to the 'Business Process' options. It will look like this:
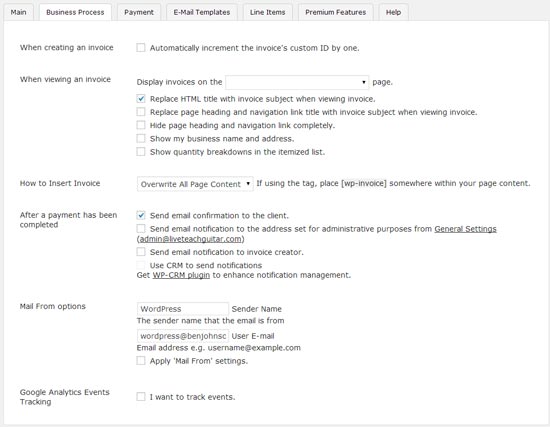
Many of the settings are optional. Here are our recommendations:
When creating an invoice: we recommend checking this box as it will automatically renumber new invoices.
Display invoices on the __ page: ensure the 'Invoices' page shows here
Show my business name and address: we recommend checking this box so the student has this information handy
After a payment has been completed: these options allow you to send confirmation emails to different people when a payment is made. We recommend enabling the first and second options so both your student and you receive a confirmation email.
Mail From options: these are optional settings to allow you to personalize the way the student receives an email. They only apply if you check the 'Apply Mail From settings'. If you want to use them, change the 'Wordpress' field to your name or your studio name and ensure the correct email address displays.
Google Analytics Events Tracking: if you use Google Analytics, you can use this option to track payments. Only recommended for advanced users.
Click Save All Settings before continuing.
Step 6: Payment Settings
Click the 'Payment' tab to double check your payment gateway.
Default Currency: Set to your local currency
Default Payment Method: ensure your preferred method displays and if you use more than one payment gateway, check the 'Client can change payment option' checkbox.
Click Save All Settings before continuing.
Step 7: E-Mail Templates
The next tab allows you to customize the emails sent out to students when they receive new invoices, reminders to pay an invoice or receipt of a paid invoice. These templates use special codes to insert information into them so unless you are familiar with this we recommend skipping this screen.
Step 8: Line Items
This screen allows you to save 'line items' which allow you to quickly fill out invoices. Whether you charge the same rate for every student or charge different rates for different types of students, it will save you a lot of time by filling this section in.
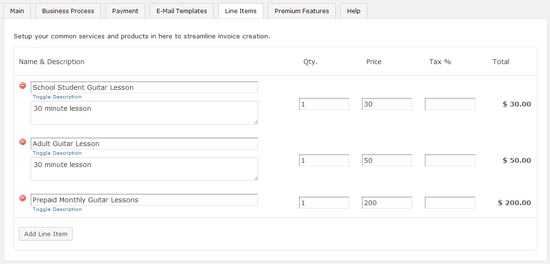
In the above example we have entered three different services that can potentially be added to invoices. This way, when a new student signs up, we simply choose the relevant service (eg: School Student Guitar Lesson) and add it to the invoice. Here are the main points to consider:
Item name: enter a short description such as '30 minute guitar lesson', 'adult guitar lesson' or 'monthly lesson - prepaid'.
Toggle Description: click this to enter a more detailed description of the service.
Qty: usually the quantity should remain at 1 unless you regularly create invoices to prepay for multiple lessons.
Price & Tax %: Set these details and check the total on the right to make sure you end up with the right end cost.
Please note that you can easily amend any of these in the actual invoice as well as create new items such as once of special prices in the actual invoices.
Click Save All Settings before continuing.
Step 9: Ready to go
That's it! You're now set up to start creating your own invoices and collecting payments. Yes it was a bit of work involved to set up, but now that you have everything ready to go you'll find it quick and easy to create and issue invoices. You can always change any settings at any time so if you add a new payment method or change details you simply go back to the settings screen and amend as you need to.